Owning a home is one of life’s most rewarding investments, but it comes with its share of responsibilities such as home exterior maintenance. On average, homeowners spend between 1% and 3% of their home’s total value on annual upkeep. While some of these costs are inevitable, many can be minimized by mastering a few basic DIY maintenance skills. Not only does this save money on contractor fees, but it also allows you to address issues quickly, often preventing minor problems from escalating into costly repairs.
By learning how to tackle common home exterior maintenance tasks, you can preserve your home’s value, maintain its curb appeal, and ensure it remains safe and comfortable for your family. In this guide, we’ll cover 10 essential DIY skills that every homeowner should have, complete with instructions, estimated contractor costs, and resources for further learning. With these skills in your repertoire, you’ll be ready to handle many of the challenges that come with homeownership.
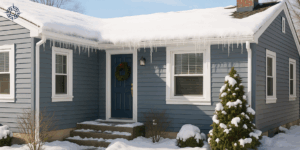
1. Shingle Replacement For Home Exterior Maintenance
- Overview: Damaged or missing shingles expose your roof to leaks and water damage. Learning how to replace them is a cost-effective skill that protects your home.
- How-To: Carefully remove the damaged shingle using a pry bar. Slide the new shingle into place, nail it down with roofing nails, and seal the area with roofing cement to ensure a watertight bond.
- Contractor Cost: $150–$300 for small repairs.
- Resource: Step-by-step guide to replacing roof shingles
Step-by-Step Guide: How to Replace or Repair Roofing Asphalt Shingles
Replacing or repairing asphalt shingles is a manageable home exterior DIY project if you have the right tools and follow safety guidelines. This guide walks you through the process to ensure your roof remains watertight and well-maintained.
Tools and Materials Needed:
- Replacement shingles (match color and type)
- Roofing nails
- Pry bar
- Hammer
- Roofing cement
- Utility knife
- Ladder
- Work gloves
- Safety harness (if on a steep roof)
- Chalk line (optional)
Step 1: Inspect the Damage
- Evaluate the Extent: Inspect the roof to determine how many shingles need replacing and check for underlying damage. Use binoculars or climb safely onto the roof if needed.
- Identify the Source of Leaks: If there’s a leak, trace it back to the damaged shingle(s) or flashing.
Step 2: Prepare for Safety
- Choose the Right Day: Select a clear, dry day to work to ensure safety and better adhesion of materials.
- Set Up Properly: Position a sturdy ladder on level ground. Wear a safety harness if the roof pitch is steep.
- Gather Tools: Bring all materials and tools up in a toolbelt or bucket to avoid multiple trips.
Step 3: Remove the Damaged Shingle(s)
- Loosen the Adhesive: Use a pry bar to gently lift the edges of the damaged shingle and break the seal of the adhesive underneath.
- Remove Nails: Slide the pry bar under the shingle above the damaged one to expose the nails holding the damaged shingle in place. Pry the nails out carefully.
- Slide Out the Shingle: Once the nails are removed, slide the damaged shingle out.
Step 4: Replace the Shingle
- Position the Replacement: Slide the new shingle into the same position as the old one, ensuring it aligns with surrounding shingles.
- Nail It Down: Secure the replacement shingle with roofing nails placed about 1 inch above the cutouts and along the sides of the shingle. Ensure nails penetrate the shingle and the roof decking.
- Seal with Roofing Cement: Apply roofing cement to the edges of the new shingle and press down firmly. Use cement to seal any areas where the adhesive was broken during removal.
Step 5: Check Your Work
- Reinspect: Ensure the new shingle is secure, flush with the others, and properly sealed.
- Tidy Up: Collect debris, old shingles, and nails, and safely descend from the roof.
Additional Tips:
- For Larger Areas: If multiple shingles are damaged, work row by row to ensure proper alignment.
- Check for Patterns: If damage is widespread, inspect for underlying issues like aging or poor ventilation that may need professional attention.
- Prevent Future Damage: Trim overhanging branches and clear debris to protect your shingles from unnecessary wear.
When to Call a Professional:
- If the damage covers a large area or involves structural issues.
- If you’re uncomfortable working on a roof or lack the necessary tools.
By following these steps, you can replace or repair damaged shingles effectively, maintaining your roof’s integrity and avoiding costly leaks or further damage.
Video example: https://www.youtube.com/watch?v=Y0Xyn9BSt2E
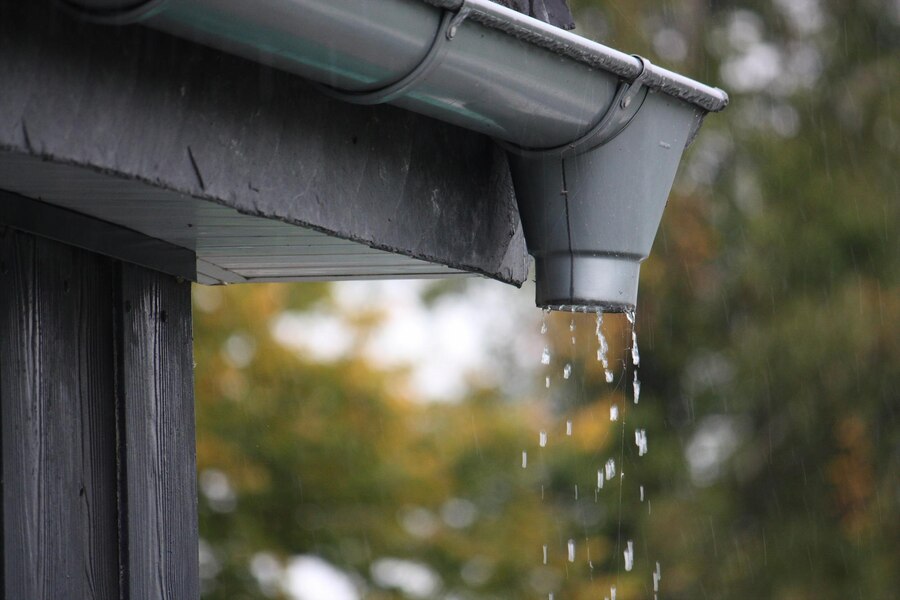
2. Clean and Reseal Gutters For Home Exterior Maintenance
- Overview: Clogged or leaking gutters can lead to water damage on your roof and foundation. Regular cleaning and resealing extend their life and effectiveness.
- How-To: Remove debris with a scoop, flush the gutters with a hose, and apply a silicone-based sealant to patch leaks or gaps at the seams.
- Contractor Cost: $100–$250 for professional gutter maintenance.
- Resource: Detailed guide on gutter cleaning and sealing
Detailed Guide: How to Clean and Seal Gutters
Regularly cleaning and sealing your gutters is essential for preventing water damage to your home. Clogged or leaky gutters can lead to roof, foundation, and siding issues, making this maintenance task a must. Here’s a step-by-step guide to help you clean and seal your gutters efficiently.
Tools and Materials Needed:
- Sturdy ladder
- Work gloves
- Safety goggles
- Garden trowel or gutter scoop
- Bucket or trash bag
- Garden hose with spray nozzle
- Gutter sealant (silicone-based or specialized gutter sealant)
- Caulking gun
- Rags or towels
- Putty knife or scraper
Step 1: Ensure Safety
- Choose the Right Day: Pick a dry, clear day for cleaning to avoid slippery surfaces.
- Set Up Your Ladder Properly: Place the ladder on level ground and use stabilizers if possible. Avoid leaning it directly against the gutters.
- Wear Protective Gear: Use gloves to protect your hands from debris and sharp edges, and wear safety goggles to prevent dirt or water from getting into your eyes.
Step 2: Remove Debris
- Scoop Out Debris: Starting at the downspout, use a gutter scoop or garden trowel to remove leaves, twigs, and dirt. Place the debris in a bucket or trash bag for easy disposal.
- Work in Sections: Clean small sections at a time, moving the ladder as needed to avoid overreaching.
- Clear Downspouts: Use a garden hose to flush out the downspouts. If clogged, insert the hose at the bottom and spray upward or use a plumber’s snake to dislodge the blockage.
Step 3: Wash the Gutters
- Rinse with a Hose: Spray the inside of the gutters with a garden hose to remove any remaining dirt or debris.
- Inspect While Cleaning: Look for signs of damage, such as rust, cracks, or sagging sections.
Step 4: Seal Leaks and Joints
- Identify Leaks: Check for water dripping from seams, corners, or small cracks while rinsing the gutters.
- Prepare the Surface: Dry the leaking areas thoroughly with a rag or towel. Use a putty knife to remove old sealant or any rusted edges.
- Apply Gutter Sealant:
- Load a caulking gun with silicone-based or specialized gutter sealant.
- Squeeze a bead of sealant along the cracks, seams, or leaky joints.
- Use your finger or a putty knife to smooth the sealant, ensuring full coverage.
- Allow to Cure: Follow the sealant’s instructions for drying time, typically 24–48 hours.
Step 5: Test Your Work
- Rinse Again: Once the sealant is dry, run water through the gutters with a hose to check for leaks and proper drainage.
- Address Remaining Issues: If leaks persist, reapply sealant or replace the affected gutter section.
Additional Tips:
- Check Gutter Slope: Ensure gutters are sloped correctly (1/4 inch for every 10 feet) to allow water to flow toward the downspouts.
- Install Gutter Guards: Consider adding gutter guards to minimize debris accumulation and reduce cleaning frequency.
- Regular Maintenance: Clean your gutters at least twice a year, in spring and fall, or more often if you have overhanging trees.
When to Call a Professional:
- If your gutters are sagging or require extensive repairs.
- If the gutters are on a multi-story home and you’re uncomfortable working at height.
By following these steps, you can maintain clean, leak-free gutters, ensuring they effectively protect your home from water damage while extending their lifespan.
Video example: https://www.youtube.com/watch?v=Q-T6pVAx_Kw
3. Patch/Replace Siding or Flashing
- Overview: Broken siding or flashing compromises your home’s insulation and exposes it to water damage. Patching or replacing sections ensures your home stays protected.
- How-To: Remove the damaged piece with a crowbar, cut a replacement to size, and secure it with nails or screws. Seal edges with home exterior caulk for a weatherproof finish.
- Contractor Cost: $300–$700 depending on the extent of the repair.
- Resource: Guide to siding and flashing repair

Guide to Siding and Flashing Repair
Damaged siding and flashing can lead to serious problems, such as water leaks, drafts, and compromised insulation. Properly repairing these elements not only protects your home but also enhances its appearance. Here’s a step-by-step guide to fix siding and flashing effectively.
Tools and Materials Needed:
- Replacement siding pieces or flashing
- Pry bar or siding removal tool
- Hammer and nails or screws
- Caulking gun
- Home exterior-grade caulk
- Measuring tape
- Utility knife or tin snips (for flashing)
- Level
- Safety gloves
- Ladder
Step 1: Inspect the Damage
- Identify Problem Areas: Look for cracks, holes, warping, or missing pieces in siding. For flashing, inspect around chimneys, vents, windows, and doors for rust, loose sections, or gaps.
- Determine the Cause: Check for underlying issues, such as water infiltration or pests, that may need additional attention before proceeding with the repair.
Step 2: Remove the Damaged Siding or Flashing
Siding:
- Loosen the Siding: Use a siding removal tool or pry bar to gently lift the siding above the damaged piece to expose the nails.
- Remove Nails: Carefully pull out the nails or screws securing the damaged section.
- Slide Out the Siding: Remove the damaged piece by sliding it out of place.
Flashing:
- Loosen the Flashing: Use a putty knife or pry bar to lift the flashing away from the structure.
- Remove Fasteners: Unscrew or pry out nails holding the damaged flashing in place.
- Clean the Area: Remove old caulk or debris from the surface to prepare it for the new piece.
Step 3: Measure and Cut Replacement Pieces
- Measure the Replacement: Use a measuring tape to determine the exact dimensions needed for the replacement siding or flashing.
- Cut the Material:
- For siding, use a utility knife or saw to cut the replacement to size.
- For flashing, use tin snips to cut a piece that matches the original shape and size.
- Test Fit: Dry-fit the replacement piece to ensure it fits properly before securing it.
Step 4: Install the Replacement
Siding:
- Slide the New Piece: Insert the replacement siding into the gap and align it with the existing panels.
- Secure with Nails: Hammer nails or drive screws through the pre-existing holes in the new siding. Ensure it’s snug but not overly tight to allow for expansion.
- Reattach Overlapping Pieces: Snap the siding above back into place.
Flashing:
- Position the New Flashing: Slide the replacement piece into place, ensuring it overlaps the roofline or siding to direct water away.
- Secure It: Use roofing nails or screws to fasten the flashing. Space fasteners evenly for a secure fit.
- Seal the Edges: Apply a bead of exterior-grade caulk along the edges to create a watertight seal.
Step 5: Check and Finish the Repair
- Inspect the Repair: Ensure the new siding or flashing is flush and properly secured.
- Paint or Stain (if needed): If the replacement piece is unpainted or unstained, match it to the surrounding area for a seamless look.
- Clean Up: Remove all debris and tools from the area.
Additional Tips:
- Prevent Future Damage: Trim overhanging branches and clean gutters regularly to avoid water and debris damage to siding and flashing.
- Choose Quality Materials: Use durable, weather-resistant materials for long-lasting results.
- Maintain Siding and Flashing: Conduct regular inspections to catch minor issues before they worsen.
When to Call a Professional:
- If the damage is extensive, such as large sections of warped or missing siding.
- If flashing repairs involve complex roof structures or chimney areas.
By following these steps, you can repair siding and flashing to protect your home from water damage and maintain its curb appeal. These straightforward repairs are manageable for most homeowners with the right tools and attention to detail.
Video example: https://www.youtube.com/watch?v=rpMwh79HGuQ
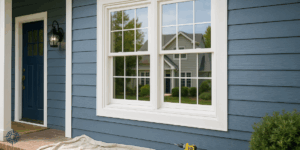
4. Resealing Windows and Doors
- Overview: Drafts or leaks around windows and doors increase energy costs and invite moisture into your home. Resealing is a quick fix to improve efficiency and protection.
- How-To: Use a utility knife to remove old caulk. Clean the surface, then apply a new bead of weatherproof caulk along the seams, smoothing it with a caulk tool or your finger.
- Contractor Cost: $150–$300.
- Resource: Tutorial on resealing windows and doors
Tutorial: How to Reseal Windows and Doors
Resealing windows and doors is an essential home maintenance task that helps prevent drafts, water leaks, and energy loss. By ensuring a proper seal, you can improve your home’s energy efficiency, enhance comfort, and protect against moisture-related damage. This step-by-step tutorial will guide you through the process.
Tools and Materials Needed:
- Utility knife or putty knife
- Caulking gun
- Weatherproof exterior-grade caulk (silicone or polyurethane)
- Painter’s tape
- Rags or paper towels
- Mineral spirits (for cleaning up excess caulk)
- Ladder (if working on second-story windows)
- Safety gloves
Step 1: Inspect the Existing Sealant
- Check for Gaps or Cracks: Examine the perimeter of windows and doors for old, cracked, or missing caulk. These gaps allow air and moisture to enter.
- Test the Seal: Run your hand along the edges on a windy day to feel for drafts. Water stains or discoloration can also indicate a failed seal.
Step 2: Remove Old Caulk
- Cut Away Damaged Caulk: Use a utility knife or putty knife to scrape away the old caulk. Take care not to damage the surrounding surfaces.
- Clean the Area: Wipe the surface with a rag to remove dirt, debris, and any remaining caulk residue. For stubborn residue, use mineral spirits or a caulk remover.
Step 3: Prepare the Surface
- Dry the Area: Ensure the surface is clean and dry before applying new caulk. Moisture can prevent proper adhesion.
- Use Painter’s Tape (Optional): Apply tape along the edges where the caulk will be applied to create clean, straight lines and protect surrounding areas.
Step 4: Apply New Caulk
- Load the Caulking Gun: Cut the tip of the caulk tube at a 45-degree angle to match the size of the gap. Load the tube into the caulking gun.
- Apply the Caulk: Starting at a corner, squeeze a continuous bead of caulk along the gap, keeping steady pressure on the trigger for a smooth application.
- Smooth the Bead: Use your finger, a caulking tool, or a damp rag to smooth the bead of caulk, pressing it into the gap for a secure seal.
Step 5: Allow Caulk to Cure
- Check the Manufacturer’s Instructions: Curing times vary but typically range from 24 to 48 hours.
- Avoid Disturbance: Keep the area free from water, dust, or physical contact during the curing process.
Step 6: Test the Seal
- Inspect for Gaps: Once the caulk is cured, check for any missed spots or uneven areas. Apply additional caulk if necessary.
- Feel for Drafts: Test the window or door for air leaks to ensure the seal is effective.
Additional Tips:
- Choose the Right Caulk: Use silicone for areas exposed to water and polyurethane for areas requiring flexibility.
- Work in Ideal Conditions: Apply caulk on a dry day when temperatures are between 40°F and 80°F for optimal adhesion.
- Replace Weatherstripping if Needed: If drafts persist, inspect and replace damaged weatherstripping for a complete seal.
When to Call a Professional:
- If your windows or doors have structural damage or the frame itself is warped.
- If you’re unsure about handling large or hard-to-reach areas.
By following these steps, you can effectively reseal your windows and doors, enhancing your home’s energy efficiency and protecting it from the elements. Regular resealing is a simple yet impactful way to maintain your home’s integrity and comfort.
For a video example: https://www.youtube.com/watch?v=dD8ahaObf4E
5. Foundation Crack Filling
- Overview: Small cracks in your foundation can lead to water intrusion and structural issues. Filling them early helps prevent costly repairs.
- How-To: Clean the crack, then inject epoxy or polyurethane filler with a caulking gun. Smooth the surface with a putty knife and let it cure as directed.
- Contractor Cost: $500–$1,000 for professional repairs.
- Resource: How to repair foundation cracks step-by-step
Step-by-Step Guide: How to Repair Foundation Cracks
Repairing foundation cracks is essential to prevent water infiltration, structural damage, and long-term deterioration of your home. Most small cracks are easy to fix using epoxy or polyurethane fillers. This guide provides step-by-step instructions to help you repair foundation cracks effectively.
Tools and Materials Needed:
- Safety goggles and gloves
- Wire brush or scrub brush
- Shop vacuum
- Concrete cleaner or mild detergent
- Chisel and hammer (for loose material)
- Epoxy injection kit or polyurethane sealant
- Caulking gun
- Putty knife or trowel
- Painter’s tape
- Waterproof concrete patch (optional for large cracks)
Step 1: Assess the Crack
- Determine the Size: Measure the width and length of the crack. Cracks smaller than 1/4 inch wide are typically non-structural and can be repaired with sealants. Larger cracks may require professional assessment.
- Check for Active Movement: Use a pencil to mark the edges of the crack and monitor for growth over time to ensure it is stable before repairing.
Step 2: Clean the Crack
- Remove Loose Debris: Use a wire brush or chisel to clean out any loose concrete, dirt, or debris from the crack.
- Wash the Area: Apply a mild detergent or concrete cleaner and scrub the surface thoroughly. Rinse with water and allow it to dry completely.
- Vacuum the Crack: Use a shop vacuum to remove any remaining debris or dust for better sealant adhesion.
Step 3: Prepare the Crack for Repair
- Widen the Crack (Optional): For narrow cracks, use a chisel and hammer to slightly widen the opening to ensure the sealant penetrates fully.
- Tape the Surrounding Area: Apply painter’s tape along the edges of the crack to keep the repair neat and protect adjacent surfaces.
Step 4: Fill the Crack
For Small Cracks (1/4 inch or less):
- Load the Caulking Gun: Cut the tip of the epoxy or polyurethane sealant tube at a 45-degree angle and load it into a caulking gun.
- Apply the Sealant: Starting at one end of the crack, squeeze the sealant into the crack, filling it completely. Use steady, even pressure to ensure the material penetrates deeply.
- Smooth the Surface: Use a putty knife or trowel to level the sealant flush with the surrounding surface.
For Larger Cracks (1/4 inch or wider):
- Insert Injection Ports: For epoxy injection kits, attach ports along the length of the crack as directed by the manufacturer.
- Seal the Crack Surface: Apply the epoxy paste over the crack and around the ports to create a watertight seal. Allow it to cure as directed.
- Inject the Epoxy: Starting at the lowest port, inject epoxy into the crack using the provided equipment. Continue until epoxy exits the next port, then seal that port and move upward.
- Remove Ports and Smooth: Once cured, remove the injection ports and smooth the surface with a putty knife.
Step 5: Allow the Sealant to Cure
- Follow Manufacturer Instructions: Curing times vary but typically range from 24 to 48 hours. Ensure the area remains undisturbed during this time.
- Inspect the Repair: Check for any gaps or areas needing additional sealant once it has cured.
Step 6: Waterproof the Area (Optional)
- Apply Waterproof Concrete Patch: For additional protection, apply a waterproof concrete patch over the repaired crack and surrounding area.
- Coat with Waterproof Sealant: Consider applying a concrete waterproofing sealant to the entire foundation wall to prevent future water infiltration.
Additional Tips:
- Monitor Repairs: Check the repaired crack periodically to ensure it remains sealed and stable.
- Prevent Future Cracks: Maintain proper drainage around your home by cleaning gutters, extending downspouts, and grading the soil away from the foundation.
- Know When to Call a Professional: If cracks are larger than 1/2 inch wide, horizontal, or show signs of structural issues (e.g., bowing walls), contact a structural engineer or foundation specialist.
When to Seek Professional Help
- Extensive cracks or visible structural damage.
- Cracks accompanied by water pooling inside the foundation.
- Repeated cracking despite previous repairs.
By following these steps, you can repair foundation cracks effectively, preventing water damage and preserving your home’s structural integrity. Regular inspections and timely maintenance will keep your foundation in excellent condition for years to come.
For a video example: https://www.youtube.com/watch?v=HjHKV2lCLQs 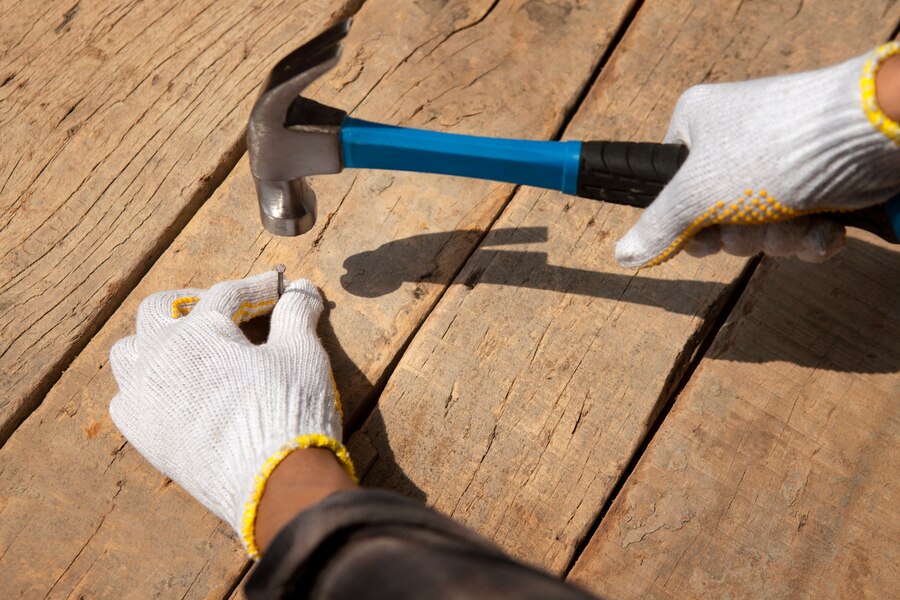
6. Replace Deck Boards
- Overview: Damaged or warped deck boards are not only unsightly but also a safety hazard. Replacing them keeps your deck functional and attractive.
- How-To: Remove the damaged board by unscrewing or prying it loose. Cut a new board to size, secure it with deck screws, and ensure it’s level with surrounding boards.
- Contractor Cost: $200–$500 for small-scale repairs.
- Resource: Deck repair guide with detailed steps
Step-by-Step Guide: How to Repair a Deck
Maintaining your deck is essential for ensuring safety, longevity, and appearance. Damaged boards, loose nails, or weakened supports can pose hazards and diminish your deck’s functionality. Follow this detailed guide to repair common deck issues effectively.
Tools and Materials Needed:
- Safety goggles and gloves
- Hammer or pry bar
- Drill with screwdriver bits
- Deck screws or nails
- Circular saw (for cutting boards)
- Replacement boards (pressure-treated wood or composite)
- Measuring tape
- Wood sealant or stain
- Sandpaper or power sander
- Level
- Chisel (optional for removing wood rot)
Step 1: Inspect the Deck
- Check for Damage:
- Look for cracked, splintered, or warped boards.
- Identify loose nails, screws, or wobbly railings.
- Inspect for wood rot, especially in areas exposed to moisture.
- Evaluate the Structure:
- Check support beams and joists for stability.
- Look for signs of rust or corrosion on metal connectors.
Step 2: Replace Damaged Deck Boards
Remove the Damaged Board:
- Loosen Nails or Screws: Use a pry bar or hammer to remove nails or screws securing the damaged board.
- Lift the Board: Pry the board up carefully to avoid damaging surrounding boards.
Measure and Cut the Replacement Board:
- Measure the Space: Use a measuring tape to determine the exact size of the replacement board.
- Cut the New Board: Cut a new board to the correct length using a circular saw.
Install the New Board:
- Position the Board: Place the new board in the gap and ensure it aligns with the surrounding boards.
- Secure the Board: Drill pilot holes and fasten the board with deck screws to prevent splitting. Use a level to confirm it is flush with adjacent boards.
Step 3: Fix Loose Nails or Screws
- Remove Loose Nails: Pull out any loose nails with a hammer or pry bar.
- Replace with Screws: Use deck screws to secure the board more firmly. Screws are less likely to loosen over time compared to nails.
Step 4: Address Wood Rot
- Remove Rotted Wood:
- Use a chisel to remove soft or decayed wood.
- For minor rot, treat the area with a wood hardener.
- Replace Rotted Sections: If rot is extensive, replace the affected board or structural component entirely.
Step 5: Reinforce Wobbly Railings
- Tighten Connections:
- Check railings for loose screws or nails.
- Secure them with additional deck screws if needed.
- Replace Damaged Rails: Remove and replace any cracked or broken railings.
Step 6: Sand and Treat the Deck
- Sand the Surface:
- Use sandpaper or a power sander to smooth rough edges or splinters on the repaired areas.
- Sand the entire deck if preparing for a new coat of stain or sealant.
- Apply Sealant or Stain:
- Use a paintbrush or roller to apply a weather-resistant wood sealant or stain.
- Allow the sealant to dry completely before using the deck.
Step 7: Check and Maintain the Deck
- Inspect Your Work:
- Walk on the deck to ensure repaired areas feel stable.
- Check screws and nails for proper placement.
- Schedule Regular Maintenance:
- Clean your deck periodically to prevent moisture buildup.
- Reapply sealant or stain every 1–3 years to protect the wood.
Additional Tips:
- Use Quality Materials: Choose pressure-treated wood or composite materials for durability. Read our guide to help you choose.
- Prevent Future Damage: Trim nearby trees to reduce debris and keep gutters clean to prevent water pooling near the deck.
- Ensure Proper Ventilation: Allow air circulation under the deck to reduce the risk of wood rot.
When to Call a Professional:
- Extensive structural damage, such as sagging beams or joists.
- Large-scale repairs requiring specialized tools or expertise.
- Replacing entire sections or rebuilding the deck.
By following these steps, you can repair your deck efficiently and prolong its life, ensuring a safe and beautiful outdoor space for years to come. Regular inspections and timely maintenance are key to keeping your deck in excellent condition.
Video example: https://www.youtube.com/watch?v=x7nqvev6l5U
7. Replace or Tighten Fencing Around Your Home Exterior
- Overview: Loose or damaged fencing reduces security and curb appeal. Regular repairs keep it sturdy and reliable.
- How-To: Replace broken slats, tighten screws or nails, and secure wobbly posts with concrete for added stability.
- Contractor Cost: $150–$400 depending on the extent of repairs.
- Resource: Fencing repair tutorial for homeowners
Step-by-Step Tutorial: How to Repair a Fence
A sturdy, well-maintained fence is essential for security, privacy, and curb appeal. Over time, fences can suffer from loose boards, wobbly posts, or broken sections due to weather or wear and tear. This guide will help you repair common fencing issues effectively. Please keep in mind that a fence can boost your home’s value.
Tools and Materials Needed:
- Hammer or screwdriver
- Drill with appropriate bits
- Pry bar
- Replacement boards or panels
- Deck screws or nails (galvanized for outdoor use)
- Post hole digger (for post replacement)
- Quick-set concrete (for post repairs)
- Level
- Measuring tape
- Saw (circular or hand saw)
- Safety gloves and goggles
- Wood preservative or stain (optional)
Step 1: Inspect the Fence
- Check for Damage:
- Look for loose or broken boards, panels, or rails.
- Identify wobbly posts that may need reinforcement or replacement.
- Note rusted nails, screws, or hardware.
- Evaluate the Cause:
- Determine if damage is due to weather, rot, or pests.
- Identify areas prone to future damage for preventative measures.
Step 2: Repair or Replace Fence Boards
Remove Damaged Boards:
- Loosen Fasteners: Use a pry bar or hammer to remove nails or screws holding the damaged board.
- Remove the Board: Carefully pull out the board to avoid damaging surrounding areas.
Install Replacement Boards:
- Measure and Cut: Measure the gap and cut a new board to size if needed.
- Attach the New Board: Secure the replacement with galvanized screws or nails. Ensure it aligns with adjacent boards.
Reinforce Loose Boards:
- Tighten Fasteners: Secure loose boards with additional screws or nails.
- Add Bracing: For sagging boards, attach a wood brace along the backside for extra support.
Step 3: Repair or Replace Fence Rails
- Inspect Rails: Check horizontal rails for signs of cracking or rot.
- Replace Damaged Rails:
- Remove the old rail by unscrewing or prying it loose.
- Measure and cut a new rail to fit.
- Attach the replacement rail securely to posts with screws or brackets.
- Reinforce Existing Rails: Use wood adhesive or brackets for additional stability.
Step 4: Fix Wobbly Fence Posts
Assess the Damage:
- If the post is loose but intact, it may only need reinforcement.
- For rotted or broken posts, replacement is necessary.
Reinforce a Loose Post:
- Dig Around the Post: Clear away dirt to expose the base of the post.
- Add Concrete:
- Mix quick-set concrete according to instructions.
- Pour the concrete around the base of the post, ensuring it fills the hole evenly.
- Level the Post: Use a level to ensure the post is straight while the concrete sets.
Replace a Damaged Post:
- Remove the Old Post:
- Dig out the post and any concrete at its base using a post hole digger.
- Cut the post into smaller sections if it’s difficult to remove.
- Install the New Post:
- Position the new post in the hole and ensure it’s level.
- Fill the hole with concrete and allow it to cure.
Step 5: Check Hardware and Fasteners
- Replace Rusted or Missing Hardware:
- Swap out old screws, nails, or brackets with new galvanized or stainless-steel hardware.
- Tighten Connections:
- Ensure all fasteners are secure to avoid future loosening.
Step 6: Sand and Treat the Fence (Optional)
- Sand Rough Areas:
- Use sandpaper or a power sander to smooth rough edges on repaired sections.
- Apply Preservative or Stain:
- Protect your fence from weather damage by applying a wood preservative or stain.
Step 7: Inspect and Maintain
- Walk the Perimeter: Test all repaired areas to ensure stability.
- Schedule Regular Inspections:
- Check your fence every season for signs of wear or damage.
Additional Tips:
- Prevent Future Damage:
- Trim nearby vegetation to prevent moisture buildup.
- Maintain proper drainage around the fence to avoid water pooling at the base.
- Use Quality Materials:
- Opt for pressure-treated wood or composite materials for better durability.
- Choose weather-resistant hardware for longevity.
When to Call a Professional:
- If your fence has extensive structural damage.
- If multiple posts or large sections need replacement.
- For specialized fences like metal or vinyl that require unique tools and expertise.
By following these steps, you can repair and maintain your fence, extending its life and keeping it looking great. Regular upkeep will save you time and money while ensuring your fence continues to provide security and privacy.
Video example: https://www.youtube.com/watch?v=y1ZIZhl-Cik
8. Seal Driveway Cracks
- Overview: Cracks in your driveway can expand and worsen with weather changes, leading to costly repairs. Sealing them early helps prevent further damage.
- How-To: Clean the crack thoroughly, fill it with asphalt or concrete filler, and smooth the surface with a trowel. Let it cure as directed.
- Contractor Cost: $200–$500.
- Resource: Driveway crack filling guide
Step-by-Step Guide: How to Fill Driveway Cracks
Cracks in your driveway may seem minor, but they can quickly worsen due to water infiltration, freezing, and thawing cycles. Repairing cracks early prevents larger damage and extends the life of your driveway. This guide will walk you through filling cracks in both asphalt and concrete driveways.
Tools and Materials Needed:
- Safety gloves and goggles
- Wire brush
- Shop vacuum or broom
- Putty knife or trowel
- Crack filler (asphalt filler or concrete repair sealant)
- Caulking gun (for sealant application)
- Bucket of water (for cleaning)
- Backer rod (for deep cracks)
- Masonry cleaner (optional, for concrete)
- Tamper or small piece of wood
- Hose or watering can (for cleaning asphalt cracks)
Step 1: Inspect the Driveway
- Evaluate the Cracks:
- Measure the width and depth of the cracks. Hairline cracks (<1/4 inch wide) are typically surface issues, while wider cracks may require additional preparation.
- Note any areas with signs of erosion or vegetation growth.
- Determine the Material:
- Use an asphalt crack filler for asphalt driveways.
- Use a concrete repair sealant for concrete driveways.
Step 2: Prepare the Crack
- Remove Debris:
- Use a wire brush to scrape out loose debris, dirt, or vegetation from the crack.
- Vacuum or sweep the crack thoroughly to ensure a clean surface for the filler.
- Clean the Area:
- For concrete driveways, use a masonry cleaner and water to remove stubborn stains or oils.
- For asphalt driveways, rinse the area with a hose or watering can and let it dry completely.
- Deep Cracks:
- For cracks deeper than 1/2 inch, insert a backer rod into the crack to reduce the amount of filler needed.
Step 3: Apply the Crack Filler
For Asphalt Driveways:
- Shake or Stir the Filler:
- If using liquid asphalt filler, shake the bottle or stir thoroughly before application.
- Fill the Crack:
- Pour the filler directly into the crack, slightly overfilling to allow for settling.
- Smooth the Surface:
- Use a putty knife or trowel to level the filler with the surrounding surface.
- Allow to Cure:
- Follow the manufacturer’s instructions for curing time, usually 24–48 hours.
For Concrete Driveways:
- Load the Sealant:
- Cut the tip of the sealant tube at a 45-degree angle and load it into a caulking gun.
- Apply the Sealant:
- Squeeze a bead of sealant into the crack, filling it completely.
- Smooth the Sealant:
- Use a putty knife or your finger (wear gloves) to smooth the sealant flush with the surface.
- Allow to Cure:
- Let the sealant dry as instructed, typically 24 hours.
Step 4: Compact and Finish
- Compact the Filler:
- For wider cracks, use a tamper or small piece of wood to compact the filler as it dries.
- Blend the Surface:
- For concrete, feather the edges of the sealant with a putty knife to blend seamlessly with the driveway surface.
Step 5: Seal the Driveway (Optional)
- Apply a Driveway Sealer:
- Once the cracks are filled and cured, consider sealing the entire driveway to protect against future damage.
- Enhance Longevity:
- Sealing creates a waterproof barrier, preventing cracks from reopening due to water infiltration.
Additional Tips:
- Work in Ideal Conditions:
- Perform repairs on a dry, mild day with temperatures between 50°F and 85°F for optimal results.
- Avoid Overfilling:
- Excess filler can create uneven patches. Apply just enough to level the surface.
- Use Quality Materials:
- Invest in high-quality fillers and sealants for durability and long-lasting repairs.
When to Call a Professional:
- If cracks are larger than 1 inch wide or affect the structural integrity of your driveway.
- If there are extensive cracks or surface damage requiring resurfacing.
By following these steps, you can easily repair driveway cracks and prevent further damage. Regular maintenance will keep your driveway looking great and ensure it lasts for years to come.
Video example: https://www.youtube.com/watch?v=xk2lT9D_0wY
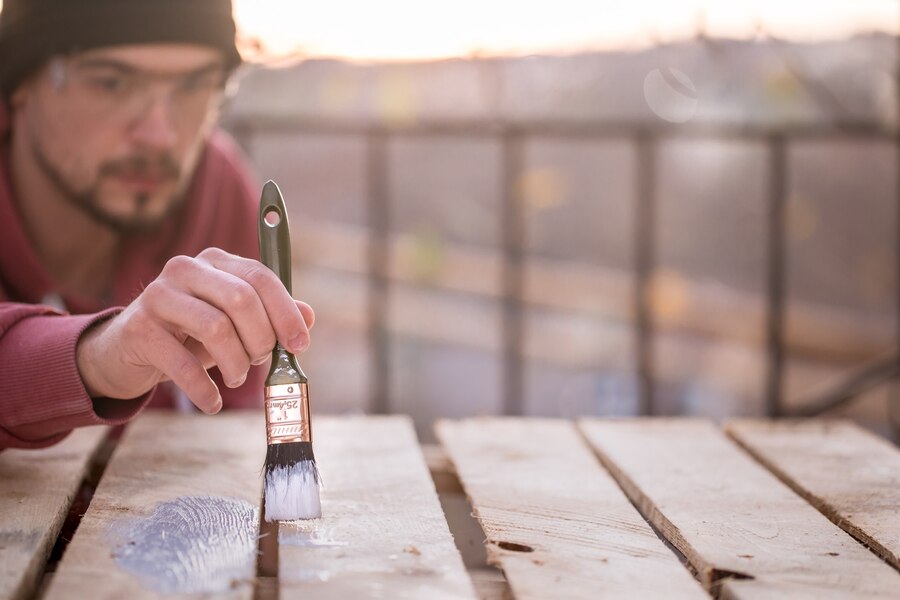
9. Touch Up Home Exterior Paint
- Overview: Peeling or fading paint not only detracts from curb appeal but also exposes surfaces to weather damage. Touch-ups protect your home and maintain its aesthetic.
- How-To: Sand the peeling area, apply primer, and repaint with weather-resistant exterior paint. Match the color to your existing paint for a seamless finish.
- Contractor Cost: $100–$500 depending on the area.
- Resource: Home exterior paint touch-up tips
Step-by-Step Guide: Exterior Paint Touch-Up Tips
Touching up home exterior paint is a quick and effective way to maintain your home’s curb appeal while protecting surfaces from weather damage. Whether you’re covering small chips or faded areas, this guide will help you achieve seamless results. Before you start, read up on 7 Crucial Things to Know Before Painting Your Siding.
Tools and Materials Needed:
- Paint (match existing color and finish)
- Paintbrushes or rollers (appropriate size for the area)
- Painter’s tape
- Sandpaper (medium and fine grit)
- Paint primer (if needed)
- Drop cloth or plastic sheeting
- Bucket of soapy water and sponge
- Clean, dry cloth
- Ladder (if necessary)
- Small putty knife or scraper (optional)
Step 1: Inspect the Area
- Identify Areas Needing Touch-Up:
- Look for peeling, chipping, or faded paint.
- Check high-traffic areas like door frames, window trims, and siding exposed to weather.
- Assess Surface Damage:
- Determine if the area requires only paint or if repairs like patching or priming are necessary.
Step 2: Prepare the Surface
- Clean the Surface:
- Use soapy water and a sponge to clean dirt, mildew, or grease from the area.
- Rinse thoroughly and let the surface dry completely.
- Sand the Edges:
- Use medium-grit sandpaper to smooth rough edges around chipped paint.
- Follow with fine-grit sandpaper for a smooth, feathered transition between the old paint and bare surface.
- Repair Minor Damage:
- Use a putty knife to fill small holes or cracks with exterior spackle. Allow it to dry and sand smooth.
- Prime (if needed):
- Apply a primer to bare wood or metal to ensure paint adhesion and prevent stains from bleeding through.
Step 3: Select the Right Paint
- Match the Existing Color:
- Use leftover paint from the original job, or bring a paint chip to a store for a color match.
- Choose the Same Finish:
- Ensure the touch-up paint matches the original finish (e.g., matte, satin, or gloss) for a seamless appearance.
- Test the Color:
- Apply a small amount of paint in an inconspicuous area to confirm the match before proceeding.
Step 4: Protect Surrounding Areas
- Tape Off Edges:
- Use painter’s tape to mask areas like trim, windows, or hardware to avoid accidental smudges.
- Cover the Ground:
- Lay down a drop cloth or plastic sheeting to protect surfaces from paint splatter.
Step 5: Apply the Paint
- Choose the Right Tool:
- Use a small brush for detailed areas like trims or edges.
- Use a roller for larger areas to blend the touch-up with the surrounding paint.
- Use Thin Coats:
- Apply the paint in thin, even coats to avoid visible brush or roller marks.
- Blend the Edges:
- Feather the paint outward over the existing paint to create a seamless transition.
- Allow to Dry:
- Let the paint dry fully before deciding if a second coat is needed.
Step 6: Inspect and Clean Up
- Check for Consistency:
- Once the paint dries, examine the area in natural light to ensure it blends with the surrounding surface.
- Remove Tape and Clean Tools:
- Peel off painter’s tape while the paint is still slightly wet to avoid peeling.
- Wash brushes and rollers immediately with water (for latex paint) or solvent (for oil-based paint).
Additional Tips:
- Work in Ideal Conditions:
- Paint on a dry day with temperatures between 50°F and 85°F. Avoid painting in direct sunlight or during high humidity.
- Use High-Quality Paint:
- Invest in durable, weather-resistant exterior paint for longer-lasting results.
- Keep Leftover Paint:
- Store leftover paint in a cool, dry place for future touch-ups.
When to Call a Professional:
- If the area requiring touch-up is too large or involves heights beyond your comfort level.
- If the original paint is significantly faded, and a complete repaint may be necessary.
By following these steps, you can easily touch up your exterior paint and keep your home looking fresh and protected. Regular maintenance ensures your investment stands the test of time and continues to impress.
Video example: https://www.youtube.com/watch?v=7qfUMNU9EdY
10. Replace or Repair Home Exterior Window Screens
- Overview: Torn or damaged window screens reduce ventilation and invite pests into your home. Replacing them is quick and cost-effective.
- How-To: Remove the screen frame, replace the screen material, and secure it with a spline roller. Cut away excess material for a clean finish.
- Contractor Cost: $50–$150 per screen.
- Resource: How to repair or replace window screens
Step-by-Step Guide: How to Repair or Replace Window Screens
Window screens are essential for keeping pests out while allowing fresh air in. Over time, screens can tear, warp, or loosen, compromising their functionality. This guide will help you repair small tears or replace the entire screen, restoring your windows to perfect condition.
Tools and Materials Needed:
- Replacement screen material (fiberglass or metal)
- Spline (rubber cord to secure the screen)
- Spline roller
- Utility knife
- Screwdriver (if removing the frame)
- Measuring tape
- Masking tape (for small repairs)
- Scissors
- Screen repair patches (for minor repairs)
Step 1: Assess the Damage
- Check for Tears or Holes:
- Small holes can be patched, while large tears may require a full replacement.
- Inspect the Frame:
- Ensure the frame is intact. Bent or damaged frames may need replacement or repair.
Step 2: Remove the Screen Frame
- Take the Frame Off:
- Use a screwdriver to remove the screen frame from the window.
- If it’s held by clips or springs, gently pry it out without bending the frame.
- Lay It Flat:
- Place the frame on a flat, clean surface for easier handling.
Step 3: Repair Small Holes (Optional)
- Patch with Tape:
- For tiny holes, apply masking tape to both sides of the screen. Trim the excess with scissors for a clean finish.
- Use a Repair Patch:
- For slightly larger holes, cut a piece of replacement screen material slightly larger than the hole. Attach it with screen adhesive or weave the edges into the existing screen.
Step 4: Replace the Screen Material
Remove the Old Screen:
- Cut Away the Screen:
- Use a utility knife to cut and remove the damaged screen from the frame.
- Remove the Spline:
- Use the tip of the knife or a screwdriver to pry the spline out of the groove. Set it aside if it’s reusable, or replace it with new spline.
Install the New Screen:
- Measure and Cut the Screen:
- Roll out the new screen material over the frame. Leave an extra 1–2 inches on all sides for trimming.
- Position the Screen:
- Align the screen over the frame, keeping it taut but not overstretched.
- Insert the Spline:
- Use a spline roller to press the spline into the groove, starting at one corner. Work your way around the frame, securing the screen tightly.
- Trim the Excess:
- Use a utility knife to cut away the excess screen material along the outer edge of the frame.
Step 5: Reinstall the Screen Frame
- Place the Frame Back:
- Align the frame with the window opening and secure it back into place using clips, springs, or screws.
- Test the Fit:
- Ensure the frame fits snugly without gaps and that the screen is taut.
Step 6: Maintain the Screen
- Regular Cleaning:
- Gently vacuum or wipe the screen to remove dirt and debris.
- Inspect Annually:
- Check for new tears or loosened spline regularly to catch small issues before they worsen.
Additional Tips:
- Choose the Right Material:
- Fiberglass is flexible and easy to work with, while metal screens are more durable but harder to install.
- Work in Ideal Conditions:
- Perform repairs in a shaded, wind-free area to keep the screen material stable.
- Use a Helper for Large Screens:
- Enlist assistance to hold the screen taut during installation.
When to Call a Professional:
- If the frame is bent or damaged beyond repair.
- For large, complex screens (like sliding patio doors) that may require specialized tools.
By following these steps, you can repair or replace window screens efficiently, maintaining your home’s functionality and appearance. Regular upkeep ensures your windows remain pest-free and allow for fresh air circulation.
Video example: https://www.youtube.com/watch?v=1_4uzIHBmic
Conclusion
Mastering these 10 essential DIY skills empowers homeowners to save money, prevent costly repairs, and gain confidence in maintaining their property. By addressing minor issues before they escalate, you can protect your home’s value and enjoy peace of mind knowing your exterior is in top condition.
That said, we understand that not everyone has the time or tools to take on these tasks. That’s where Compass Exteriors comes in. Our team of experts specializes in home exterior maintenance and renovation, from small fixes to major projects. Whether you need professional repairs, inspections, or upgrades, Compass is here to help.
Contact Compass Exteriors today for expert advice and top-notch service. Let us take care of your home, so you can focus on enjoying it.